

Reliable Safety Valve Maintenance Tips for Preventing Pressure Failures
2026-11-16
Pressure failures rarely start with a bang. More often, they begin with a sticky safety valve, a slow seat leak, or an inspection that gets postponed one too many times. This guide pulls together reliable safety valve maintenance tips designed to stop pressure failures before they escalate—focusing on the small, practical checks that make a real difference in the field. From set pressure verification to clearing blocked discharge lines, each recommendation is meant to be actionable and easy to fit into your routine. At HONGSEN, we know that dependable equipment starts with maintenance done right, not just done quickly.
Catch a Weeping Valve Before It Turns Into a Rupture
The first sign is usually so small it gets wiped away and forgotten: a faint damp line at the gland, a drip that leaves a rusty teardrop on the pipe, or a tiny hiss that only shows up when the system cools. Most plants call it a weeping valve and keep it on a list somewhere, because it is not bad enough to shut down. But a weep is not a static condition. It is a leak trying to grow.
Every pressure cycle and temperature swing works the weak point wider. The packing loses its resiliency, the stem picks up a score mark, and the seating face starts washing out. Soon the drip becomes a stream, and the stream finds a path toward electrical panels, walkways, or hot surfaces. That is when a simple gland repack turns into an emergency isolation or a line break.
Treat the early warning as free lead time. A quick check with a mirror on underside flanges, a thermal gun for wet insulation, or a simple tissue test around the stem can catch a weep before it changes pitch. Change hardened packing, reseat or lap the mating faces, and document the location so the next inspection knows what to compare. A weeping valve is one of the few failures that gives you room to plan; ignoring it just gives the failure a head start.
Set Pressure Drift Is the Warning Sign Most Teams Miss
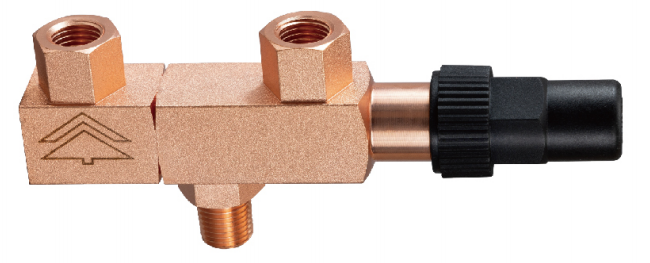
Pressure readings rarely fail all at once. What happens instead is a slow slide: a tenth of a bar here, a few psi there, stretched across hundreds of cycles. Most crews glance at the gauge, see a number close enough to the target, and move on. That drift, though, is the equipment quietly asking for attention. It shows up in longer fill times, slightly uneven wear, or a compressor that runs hotter than usual without tripping an alarm.
The problem is that drift rarely appears in a single shift report. It hides in the gap between what the sensor says and what the system actually needs. A seal degrading, a valve sticking, a regulator losing its reference—each one contributes a small error that compounds over time. By the time the pressure loss becomes obvious, the damage is usually already done, and the fix costs far more than a simple adjustment would have.
Watching for drift means looking past the daily averages. Compare cold-start readings, check recovery time after a cycle, and note how much correction the controller applies. Those small, repeated adjustments are a better early warning than any sudden drop. Teams that track them can schedule maintenance before a nuisance becomes a failure; teams that ignore them end up chasing a problem that was visible for weeks.
Trim Corrosion Does Its Worst Work Out of Sight
Most trim looks harmless from the outside, but the real trouble starts where the piece meets the body. Dirt, road salt, and moisture settle into that narrow gap and stay there long after the rest of the panel has dried. The paint underneath never gets a chance to breathe, so the metal begins to break down silently behind the trim. By the time a small stain or bubble appears at the edge, the hidden area is usually worse than the visible damage suggests.
Water often finds its way behind trim through mounting holes, worn clips, or tiny cracks in the sealant. Once it is trapped, daily temperature swings pull moisture deeper into the seam. On some vehicles, the fasteners themselves scrape away the protective coating during installation, leaving bare metal pressed tightly against a damp surface. From there, rust spreads outward under the paint while the outside still looks smooth and glossy.
A quick visual check is not enough. You have to lift or remove the trim to see what is happening underneath, especially along the lower edges of doors, fenders, and tailgates. If you wait until rust is visible on the outer surface, the repair usually involves cutting and welding rather than simple surface treatment. Keeping drain slots clear and checking seam sealer early can stop hidden corrosion before it becomes a structural problem.
If the Valve Lifted, the Paper Trail Matters
A lifted valve is never just a mechanical detail. It means someone made a call, or a procedure was skipped, or a system drifted far enough to move a component that should have stayed put. The fastest way to understand which one happened is to read the paperwork from that shift. Signatures, time stamps, and short handwritten notes usually carry more truth than a room full of people trying to remember.
Paper records tend to reveal trouble before the hardware does. A run of inspection sheets might mention a sticky handwheel or a faint leak for days, with no matching work order. When the valve finally lifts, that gap is the story. Laying the sheets side by side shows the delay, the missed follow-up, and the point where a small note should have become a repair.
After something breaks, there is always pressure to focus on the damaged part. But the paper trail does what the metal cannot. It shows who approved the job, who signed off, and which step never happened. Without those pages, a lifted valve is just a silent chunk of steel. With them, it becomes a sequence of decisions that can actually be fixed.
Bench Testing After a Pop Is Maintenance, Not Overkill
Popping a breaker or a fuse right after bench testing might feel like a setback, but it’s actually the system doing its job. The moment you wire up a new circuit or swap a component on the bench, small mistakes like a reversed polarity, a stray solder bridge, or an undersized test lead can quietly sneak in. A pop is the loud, honest way the hardware tells you something didn’t match the schematic. Instead of reaching for a bigger fuse or ignoring the smell of hot insulation, treat that interruption as useful data. It narrows the problem from “the whole design is questionable” down to “the current took a path it shouldn’t have.”
Regular bench testing without a planned fault stop is where real overkill lives. When nothing ever trips, you start trusting a setup that may be hiding marginal connections, drifting loads, or a power supply running closer to its limit than the label suggests. A pop is a forced checkpoint. It asks you to verify the wiring, check the inrush current, and confirm the protection device is sized for the actual load, not the ideal load from the datasheet. That kind of pause after a fault makes the next power-up calmer and more deliberate. You learn the difference between a nuisance trip from a cheap clip lead and a warning sign from a failing capacitor.
So the next time a bench test ends with a pop, skip the grumbling and grab the meter. Look at where the heat left a trace, compare the board to the drawing one more time, and replace the fuse only after you’ve found a concrete reason. That small ritual turns a blown part into a cheap lesson instead of a hidden time bomb. Maintenance after a fault is rarely the expensive part of the project; losing a whole afternoon to a smoke cloud because you rushed the first power-up is. A pop that happens on the bench, where you can see it, is a favor.
Installation Shortcuts That Quietly Invite Pressure Failure
Most pressure failures tied to installation shortcuts start with a flange that was never allowed to seat naturally. Instead of aligning the pipe and letting the gasket do its job, crews pull the gap closed with bolts, which bends the flange, unevenly compresses the gasket, and creates a stress riser that shows up weeks later under thermal cycling.
Another quiet shortcut is skipping the dry fit or reusing a gasket that has already taken a compression set. It can look fine on the bench, but once the system reaches operating pressure, the sealing surface has no recovery left. Small leaks at threaded joints follow the same pattern: tape or paste applied too quickly with the wrong overlap, threads bottomed out instead of properly engaged, and no allowance for vibration.
Support and expansion are often the first things omitted when a schedule gets tight. Anchoring a line in the wrong place, leaving a long run without a guide, or forcing a spring hanger to fit can put the pipe in a constant fight with its own pressure load. The failure rarely happens during the first fill; it waits for a cold start, a water hammer, or a minor temperature swing to finish the job.
FAQ
Most facilities start with an annual inspection cycle, but the exact interval depends on the service environment. Valves handling dirty, corrosive, or polymerizing fluids often need checks every six months, while clean dry gas service may stretch to three years if historical records show stable pop pressures.
Look for discoloration or crystallization around the seat and nozzle, light scoring on the disc, or traces of process fluid downstream. A rising downstream pressure with no overpressure event usually means the valve is leaking and is no longer sealing tightly.
Bench testing lets you control the ramp rate, capture accurate opening and reseat pressures, and inspect internal parts without risking a sudden release into the header. In-place popping can mask seat damage and may overstress old springs, so it is usually reserved for a rough field check.
Using undersized inlet piping or adding isolation valves upstream is a common cause of chatter and restricted flow. Mounting the valve horizontally instead of vertical, or using long unsupported discharge piping, can also distort the body and shift the set pressure.
Log the as-found and as-left set pressures, reseat pressure, leakage rate, parts replaced, and any signs of corrosion or solids in the inlet. Tracking drift across service intervals helps you decide whether to shorten the inspection cycle or change materials before a failure occurs.
Repeated leakage after lapping usually points to misalignment, a warped disc, or a worn bushing rather than a simple rough seat. At that point, check stem concentricity and guide clearances, and replace the nozzle if the seat width is outside the manufacturer's tolerance.
Not automatically. Pressure may stay steady while corrosive deposits, polymer buildup, or vibration still degrade the spring and seat. Extend intervals only after trend data from previous overhauls shows consistent as-found set points and minimal seat wear.
Conclusion
Safety valve upkeep often gets reduced to a quick visual check, yet the early signs of trouble rarely announce themselves. A valve that seeps around the seat or shows a faint stain is already telling you the sealing surface has begun to suffer; ignoring that weep can let a manageable repair turn into a sudden rupture. Just as telling is a shift in set pressure. Even a small drift from the stamped rating means the spring or bellows is no longer behaving as designed, and many teams overlook it until a relief event either fails to open or opens too late. Corrosion on internal trim is another silent problem. It works behind the valve body where routine inspections do not reach, gradually eating away at seats and guides until the valve can no longer reseat cleanly after a discharge.
Once a safety valve has lifted, the event itself should leave a record. Logging the pressure, date, duration, and any visible discharge helps later testing reveal whether the valve still performs within its original tolerance. A pop is not the end of the story; bench testing after activation is how you confirm set pressure, blowdown, and seat tightness under controlled conditions instead of waiting for the next overpressure to expose a hidden defect. Finally, installation decisions can quietly defeat even a well-maintained valve. Improper gaskets, misaligned piping, undersized drains, or a missing drip pan elbow can add stress and trapped debris that increase the chance of pressure failure. Attention to these details keeps a safety valve reliable rather than leaving it as a last line of defense that may not hold.
Contact Us
Contact Person: KOPASS HO
Email: [email protected]
Tel/WhatsApp: 8613606566112
Website: https://www.hongsenref.com/